How to Choose the Right Screen Printing Kit for Beginners
Screen printing has become one of the most popular ways to create custom designs on clothing, posters, tote bags, and many other surfaces. What used to be a specialized printing technique used mainly by professional studios is now accessible to hobbyists, small businesses, and DIY enthusiasts around the world. Thanks to affordable tools and beginner-friendly equipment, anyone can start experimenting with printing their own graphics at home. Whether you want to launch a small clothing brand, create personalized gifts, or simply explore a creative hobby, learning the basics of screen printing can open up many possibilities.
For most beginners, the easiest way to start is by using a complete screen printing kit that includes the essential tools required for the process. Instead of buying each item separately and trying to understand how everything works together, a well-designed kit provides a structured starting point. It usually contains screens, inks, squeegees, emulsions, and other fundamental tools that allow beginners to focus on learning the technique rather than assembling equipment. This approach not only saves time but also helps avoid common mistakes that many first-time printers make when building their setup from scratch.
Choosing the right kit, however, can be confusing if you are new to the world of screen printing. There are different types of kits designed for various materials, production volumes, and experience levels. Some are intended for printing simple designs on paper or fabric, while others are built for producing professional-quality prints on garments like t-shirts and hoodies. Understanding the differences between these options is important if you want to start your screen printing journey with the right tools and avoid unnecessary expenses or limitations later on.
What Makes a Good Screen Printing Kit for Beginners
Getting started with screen printing can feel complicated at first because the process involves several stages – preparing the screen, transferring a design, applying ink, and curing the print. For beginners, using a well-designed screen printing kit makes the learning process significantly easier. Instead of searching for separate tools and trying to understand how they work together, a complete kit provides everything needed to begin experimenting with printing projects right away.
Most beginner-friendly kits are built to simplify the workflow and remove technical barriers. They usually combine essential equipment such as frames, inks, exposure tools, and preparation materials into a single package. This allows beginners to focus on learning the technique itself rather than worrying about missing components or incompatible tools.
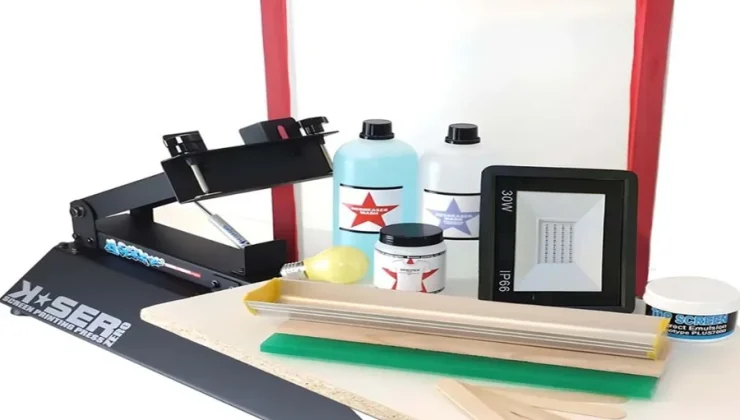
Key elements usually included in a beginner screen printing kit:
- A screen printing frame with mesh suitable for fabric or paper
- A squeegee used to spread ink evenly across the screen
- Screen printing ink designed for textiles or paper surfaces
- Photo emulsion used to transfer designs onto the screen
- A scoop coater for applying the emulsion layer
- A UV lamp or exposure light for preparing the screen
- Degreaser and emulsion remover for cleaning and screen preparation
- Additional accessories such as spatulas, gloves, and printing films
Having these tools in one package allows beginners to practice the entire screen printing process from start to finish without needing additional equipment.
Essential Screen Printing Kit Equipment
Understanding the core equipment inside a screen printing kit helps beginners choose the right setup for their projects. While professional print shops may use large machines and complex production systems, the basic screen printing workflow actually relies on a few essential tools that work together to transfer designs onto different surfaces.
The most important components are the screen printing frame and the squeegee. The frame holds the mesh that acts as a stencil for the design, while the squeegee pushes ink through the mesh onto the material below. Other tools included in beginner kits – such as photo emulsion, exposure lamps, and cleaning solutions – help prepare the screen and maintain consistent printing results.
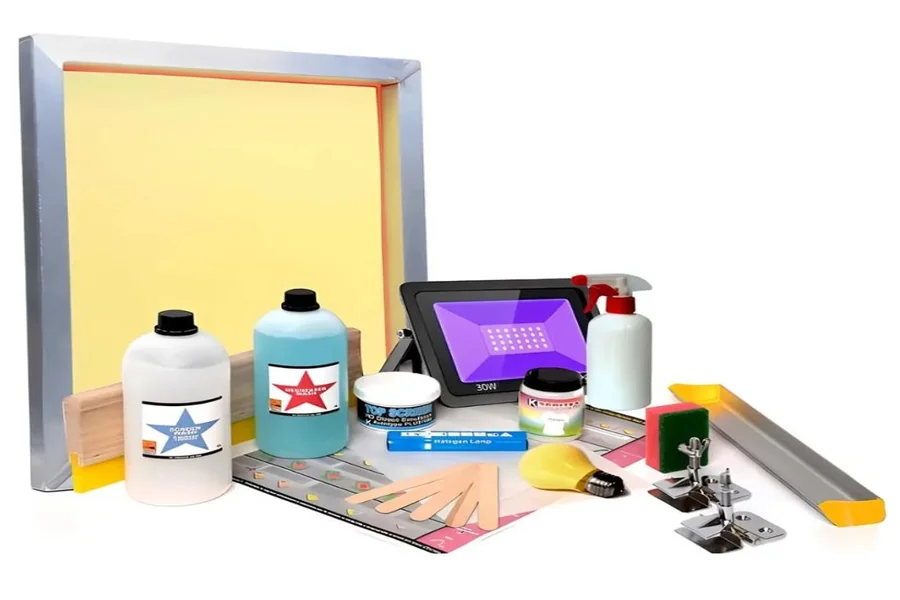
Main equipment found in most screen printing kits:
- Screen printing frame – holds the mesh used to transfer the design
- Squeegee – spreads ink evenly across the screen surface
- Photo emulsion – creates the stencil used for printing
- Exposure light – hardens the emulsion to form the design
- Screen printing ink – produces the final printed image
- Cleaning chemicals – prepare and restore screens for reuse
TIP: When choosing a screen printing kit, look for sets that include both printing tools and preparation materials. This ensures you can complete the full printing process – from creating the stencil to producing the final print – without needing to purchase additional equipment.
Types of Screen Printing Kits for Different Projects
Not all screen printing kits are designed for the same purpose. Some are optimized for textile printing such as t-shirts and hoodies, while others are better suited for printing on paper, posters, or cardboard. Understanding the differences between these kits helps beginners choose equipment that matches the type of projects they want to create.
For example, textile printing kits usually include thicker inks and mesh screens designed for fabric surfaces. Paper printing kits, on the other hand, often use finer mesh screens that allow more detailed graphics and cleaner edges on posters or graphic prints. Some kits also include manual printing presses that help stabilize the screen during printing, which is especially useful when working on garments.
Below is a simplified comparison of common screen printing kit types:
| Type of Screen Printing Kit | Best For | Typical Materials |
| Textile screen printing kit | T-shirts, hoodies, tote bags | Fabric, cotton, apparel |
| Paper printing kit | Posters, art prints, packaging | Paper, cardboard |
| DIY beginner kit | Learning and small projects | Fabric, paper |
| Screen printing kit with press | Repeated printing and small production | Apparel and textiles |
TIP: If you’re planning to print on clothing, choose a kit specifically designed for textile printing. These kits usually include the correct mesh screens and inks needed to produce durable prints that hold well on fabric.
Where to Buy Screen Printing Kits for Home Projects
Once you understand what tools are needed and which type of kit fits your projects, the next step is choosing a reliable place to purchase your equipment. Beginners often benefit from buying complete sets instead of assembling tools separately. A full kit ensures that all components are compatible and designed to work together, which simplifies the learning process.
Today many specialized stores offer beginner-friendly printing kits that include frames, inks, exposure tools, and preparation materials. For people interested in learning screen printing at home, it can be helpful to look for suppliers that focus specifically on DIY printing equipment and provide clear instructions for beginners.
Some advantages of buying complete screen printing kits include:
- All essential tools included in one package
- Equipment designed to work together properly
- Beginner-friendly instructions and workflow
- Suitable tools for printing on fabric or paper
- A faster way to start learning screen printing
If you’re looking for beginner-friendly equipment, you can explore screen printing kits available at Keygadgets, which offer complete starter setups designed for learning the screen printing process without requiring professional studio equipment.
Starting with the right kit allows beginners to focus on creativity and experimentation rather than worrying about technical setup.
Common Mistakes When Choosing a Screen Printing Kit
Many beginners are excited to start screen printing, but choosing the wrong equipment can quickly make the process frustrating. One of the most common mistakes is selecting a kit without understanding what type of projects it is designed for. Some kits are optimized for fabric printing, while others work better for paper or cardboard. If the equipment doesn’t match your intended materials, the results may not look as expected.
Another frequent mistake is focusing only on price instead of overall functionality. Very cheap kits sometimes lack essential tools such as proper exposure equipment, quality inks, or preparation materials. Without these components, beginners may struggle to achieve consistent prints and may end up buying additional tools later.
Common mistakes beginners make when choosing a screen printing kit include:
- Buying a kit without checking what materials it is designed for
- Choosing extremely cheap kits with missing components
- Ignoring the importance of mesh count for different printing surfaces
- Buying tools separately instead of a complete beginner set
- Overlooking preparation tools such as degreasers or emulsion removers
Avoiding these mistakes can save both time and money, while also making the learning experience much more enjoyable. A well-balanced beginner kit should provide everything needed to complete the full screen printing process from design preparation to the final print.
How to Start Screen Printing at Home
Starting screen printing at home is easier than many people expect. With the right screen printing kit and a small workspace, beginners can quickly learn the fundamentals and begin experimenting with different designs and materials. Many hobbyists start by printing simple graphics on t-shirts, tote bags, or posters before gradually moving on to more complex projects.
The key to success is understanding the basic workflow of the process. Screen printing involves preparing a stencil using photo emulsion, exposing the design onto the screen, applying ink with a squeegee, and allowing the print to dry or cure properly. Once you learn these steps, the process becomes much more intuitive and opens the door to creative experimentation.
To get started with screen printing at home, beginners usually follow these basic steps:
- Prepare the screen using photo emulsion
- Expose the design onto the screen using an exposure light
- Place the fabric or paper beneath the screen
- Apply ink and pull it across the screen using a squeegee
- Lift the screen to reveal the printed design
- Allow the print to dry or cure properly
With practice, screen printing becomes a highly rewarding creative process. Beginners often start with small projects and gradually improve their technique, producing more detailed prints and experimenting with new materials and designs.
Conclusion: Screen Printing Kit for Beginners
Choosing the right screen printing kit is the first important step for anyone who wants to explore the world of custom printing. With the right tools and a basic understanding of the process, beginners can quickly learn how to create unique designs on fabrics, posters, and many other surfaces. What makes screen printing especially appealing is that it combines creativity with practical skills, allowing anyone to experiment with their own graphics and ideas.
A well-selected screen printing kit simplifies the learning process by providing the essential equipment needed to start printing at home. Instead of spending time trying to assemble individual tools, beginners can focus on mastering the technique and improving their results with practice. As experience grows, many hobbyists discover new ways to expand their projects, experiment with different materials, and develop their own printing style.
For many creators, screen printing becomes more than just a hobby – it turns into a creative outlet or even the foundation for a small business. By starting with the right equipment and learning the basics step by step, anyone can begin exploring the possibilities of screen printing and gradually build the skills needed to produce high-quality custom prints.